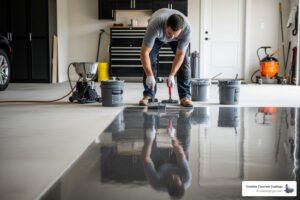
What Is Epoxy Floor Painting — and Is It Right for Your Garage?
Epoxy floor painting is one of the most effective ways to protect and transform a concrete floor. Here’s a quick snapshot of what you need to know:
- What it is: A coating system — usually two parts (resin + hardener) — that chemically bonds to concrete for a hard, durable finish
- Best for: Garages, basements, pool decks, and commercial spaces with heavy foot or vehicle traffic
- Key benefits: Resists hot tire pickup, chemicals, stains, and abrasion; easy to clean; improves appearance
- How long it lasts: 10+ years when properly installed and maintained
- Cure time: Light foot traffic in 18–24 hours; vehicles after 7–10 days
- Coverage: Roughly 100–250 sq. ft. per gallon depending on product and surface porosity
Whether your garage floor is cracked, stained, or just plain worn out, a professional epoxy system can give it a clean, showroom-quality finish that holds up to real-world abuse. But not all epoxy products are the same — and the prep work matters just as much as the coating itself.
This guide walks you through everything: product types, surface preparation, application steps, color options, and long-term care.
I’m Scott Shannon, owner of Creative Concrete Coatings and a Marine Corps veteran with decades of hands-on experience in epoxy floor painting for homes and businesses across Georgia. Let’s get into what actually works — and what doesn’t.

Understanding Professional 2-Part Epoxy Coatings
When homeowners start researching epoxy floor painting, they often get confused by the term “paint.” In professional coatings, there is a massive difference between a 1-part “epoxy paint” you find on a hardware store shelf and a professional 2-part resinous coating.
A 1-part epoxy is essentially a latex acrylic paint with a small amount of epoxy added for stickiness. It dries by evaporation. On the other hand, a professional 2-part system consists of a resin (Part A) and a hardener (Part B). When these are mixed, a chemical reaction occurs that creates a cross-linked bond. This isn’t just sitting on top of the concrete; it is chemically fused to it.

At Creative Concrete Coatings, we focus on advanced resinous flooring solutions because they offer superior resistance to “hot tire pickup”—that annoying phenomenon where hot tires from a drive home literally peel the paint off the floor as they cool. If you are looking for who installs epoxy floors in Monroe GA that can handle heavy traffic, you want a 100% solids system. These systems are significantly thicker (often 18-22 mils) compared to DIY kits that may only be 3-4 mils thick.
Essential Preparation for Professional Epoxy Floor Painting
If you remember one thing from this guide, let it be this: Surface preparation is 90% of the job. You could select the highest-quality resin in the world, but if you apply it over a dirty or smooth floor, it will peel. We see it all the time in Lawrenceville and Suwanee—beautiful floors that start bubbling because the prep was rushed.
Surface Profiling and Diamond Grinding
To get a “mechanical bond,” the concrete needs to feel like 60-grit sandpaper. This is known as the Concrete Surface Profile (CSP). For most residential garages, we aim for a CSP 2.
While some DIY guides suggest acid etching (using a mild acid to eat into the concrete), we prefer diamond grinding. We use heavy-duty floor grinders with diamond-impregnated segments to “open up” the pores of the concrete. This removes “laitance” (a weak, milky layer on top of new concrete) and ensures the epoxy can soak in deep.
Moisture Testing
Concrete might look dry, but it often holds “hydrostatic pressure” or moisture vapor. We perform a calcium chloride test or use a moisture meter to ensure the vapor emission rate is within safe limits (usually below 4.5 to 6 lbs per 1,000 sq. ft.). If moisture is too high, the epoxy will eventually delaminate. In these cases, we apply a specialized moisture-blocking primer before the main coat.
Repairs and Cleaning
Before the first drop of epoxy hits the floor, we address the “bones” of the concrete:
- Degreasing: Oil stains are the enemy of adhesion. We use industrial degreasers to pull oil out of the pores.
- Crack Repair: We use a high-strength concrete patch or a 100% solids epoxy filler to bridge cracks and divots. Once cured, we grind these patches flush so they disappear under the coating.
- Vacuuming: After grinding, the floor is covered in fine dust. We use industrial HEPA vacuums to ensure the surface is surgically clean. Even a little dust can cause “fish-eyes” or tiny bubbles in the finish.
Tools and Materials for a Professional Finish
Achieving a flawless epoxy floor painting result requires more than just a brush and a bucket. If you’re attempting this yourself or watching our crew work in Hoschton or Dacula, you’ll notice a specific set of tools designed for high-performance resins.
Step-by-Step Guide to Applying Epoxy Floor Painting Systems
Once the floor is prepped, the clock starts ticking. Epoxy has a “pot life,” which is the amount of time you have to work with the material before it hardens in the bucket.
- Mixing: We use a Jiffy mixer attachment on a high-torque drill. Part A and Part B must be mixed for a full 3 minutes at medium speed to ensure the chemical reaction is uniform.
- The Prime Coat: This thin layer seals the concrete and prevents “outgassing”—air bubbles rising out of the concrete pores.
- The Base Coat: This is the thick, colored layer. We use a squeegee to spread the material evenly and a 3/8″ nap roller to “back-roll” it for a uniform texture.
- Broadcasting Flakes: While the base coat is wet, we broadcast decorative flakes into the air, letting them rain down into the resin. This provides color, texture, and strength.
- The Topcoat: After the base coat is cured and excess flakes are scraped away, we apply a clear topcoat (often polyaspartic or high-wear urethane) for UV protection and chemical resistance.
Safety Note: Always ensure proper ventilation. Some epoxies contain chemicals that require PPE (Personal Protective Equipment) and may carry a CA Prop 65 Warning regarding chemical exposure. At Creative Concrete Coatings, we prioritize low-VOC, 100% solids resins that are safer for your family and our team.
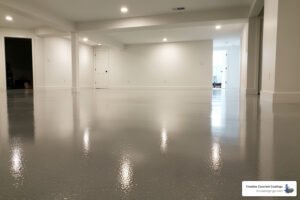
For industrial settings where a uniform look is required without the “speckled” appearance, we often recommend a Solid Color Industrial system, which provides a high-gloss, seamless finish.
Customizing Your Floor with Additives
One of the best parts of epoxy floor painting is the customization. You aren’t stuck with “battleship gray.”
- Flake Blends: You can choose from hundreds of color combinations to match your cabinets or even your favorite sports team.
- Non-Slip Grit: We often add aluminum oxide or a clear anti-skid additive to the topcoat. This ensures the floor isn’t like an ice rink when it gets wet from a Georgia rainstorm.
- UV Resistance: Standard epoxies can “amber” or turn yellow if exposed to direct sunlight. We use UV-stable topcoats to keep your floor looking better than the neighbors’ for years to come.
Curing, Coverage, and Long-Term Maintenance
Understanding the measurements and the “wait” is crucial for a successful project.
Coverage and Thickness
A typical 100% solids epoxy kit has a specific coverage rate. One gallon generally covers 100–175 sq. ft. at a professional thickness. If you try to stretch it to 300 sq. ft., the coating will be too thin to provide the durability you need. We aim for a “high-build” finish that ranges from 15 to 30 mils thick, depending on the system.
The Waiting Game (Curing Times)
Even though the floor might feel dry to the touch in a few hours, the chemical “cross-linking” takes time.
- Foot Traffic: Usually safe after 18–24 hours.
- Heavy Items/Cabinets: Wait 48–72 hours.
- Vehicle Traffic: Do not park your car on the floor for at least 7–10 days. Parking too early can cause “hot tire pickup,” even on a professional floor, because the resin hasn’t reached its full Shore D hardness.
Long-Term Maintenance
Maintaining your new floor is surprisingly easy. You don’t need harsh waxes or strippers.
- Daily: Use a soft-bristle broom or a leaf blower to remove dust and debris.
- Weekly: Mop with a pH-neutral cleaner mixed with warm water. Avoid soap-based cleaners, as they can leave a dull film on the high-gloss finish.
- Longevity: A properly installed resinous floor should last 10 years or more. If the shine eventually starts to fade after a decade of heavy use, the floor can often be “rejuvenated” by lightly sanding the surface and applying a fresh topcoat, rather than a full replacement.
Troubleshooting and Success Strategies
Even with the best intentions, epoxy floor painting can go wrong if you ignore the science.
Avoiding Common Failures
The number one reason for coating failure is inadequate surface preparation.
- Peeling/Delamination: Usually caused by applying epoxy over a sealed or smooth floor without grinding.
- Bubbling: Often caused by “outgassing” from the concrete when the temperature rises. We apply our coatings in the late afternoon when the concrete is cooling down to prevent this.
- Mixing Errors: If Part A and Part B aren’t mixed thoroughly, you’ll end up with “soft spots” that never fully cure.
Handling Difficult Concrete Substrates
Not every garage floor is a perfect canvas.
- Oil-Stained Concrete: We use specialized “Oil Stop” primers that are designed to bond to concrete even if there is deep-seated oil residue.
- Existing Paint: You cannot apply professional epoxy over old 1-part floor paint. The epoxy is so strong that as it cures and shrinks slightly, it will literally pull the old paint off the concrete. We always grind off old paint down to the bare substrate.
- Moisture Barriers: If your home in Alpharetta or Johns Creek has a high water table, we use a moisture-remediation epoxy primer to prevent bubbles from forming later.
Frequently Asked Questions about Epoxy Flooring
How long does an epoxy floor last?
When professionally installed using a 2-part 100% solids system and protected by a high-quality topcoat, an epoxy floor typically lasts 10 to 15 years in a residential setting. In commercial environments like warehouses in Braselton or Buford, they are designed to withstand heavy forklift traffic for a decade or more.
Can I apply epoxy over existing floor paint?
Short answer: No. Professional-grade epoxy requires a direct bond to the concrete pores. If you apply it over old paint, your new floor is only as strong as the old, weak paint underneath. We always recommend diamond grinding to remove any previous coatings.
When can I park my car on the new floor?
We recommend waiting 7 to 10 days before driving or parking a vehicle on the floor. While it may feel hard to the touch after 24 hours, the full chemical resistance and hardness take about a week to develop. Using it too early can lead to permanent tire marks or impressions.
Conclusion
Epoxy floor painting is a transformative upgrade for your home or business. It turns a dusty, stained garage into a clean, bright, and functional space that adds real appeal and durability to your property. However, the difference between a “weekend project” that peels in six months and a professional floor that lasts a decade lies in the preparation, the quality of the resins, and the experience of the installers.
At Creative Concrete Coatings, we bring over 25 years of experience to every job. Based in Monroe, GA, we’ve installed more than 455,000 square feet of high-performance coatings across North Georgia—from Athens and Watkinsville to Loganville and Suwanee. We stand behind our work with a 100% satisfaction guarantee.
If you’re ready to stop looking at that ugly concrete and start enjoying a showroom-quality finish, we’re here to help. Our team specializes in everything from heavy-duty flake floors to sleek industrial solids.
Ready to transform your space? Contact the local experts at Creative Concrete Coatings today.